


📰 Table Of Contents
- 1 How to Fix Leaking Propane Tank Valve: Step-by-Step Guide
- 2 DIY Off Grid Propane Tank Refill
- 3 What should be done if the propane tank is leaking at the valve?
- 4 How can a propane tank valve be unstuck?
- 5 Can a rubber seal be replaced in a propane tank valve?
- 6 How can a small propane leak be repaired?
- 7 Questions you’ve probably asked yourself
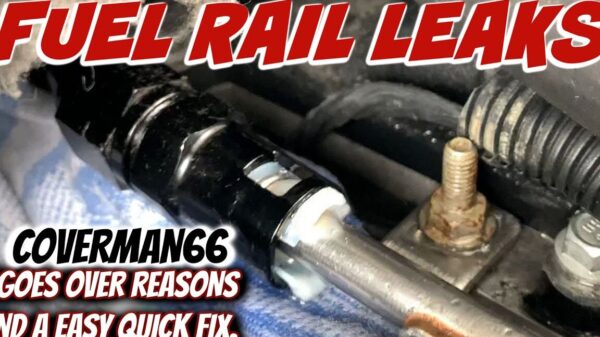
How to Fix Leaking Propane Tank Valve: Step-by-Step Guide
Sure! Here’s a step-by-step guide on How to Fix Leaking Propane Tank Valve:
Step 1: Safety first! Before attempting any repairs, make sure you have turned off the propane tank valve and disconnected it from any gas source.
Step 2: Inspect the valve for any visible signs of damage or wear, such as cracks or corrosion. If you notice any, it may be necessary to replace the entire valve.
Step 3: Using an adjustable wrench, carefully remove the valve from the propane tank by turning it counterclockwise. Be cautious not to apply too much pressure and avoid damaging the tank threads.
Step 4: Once the valve is removed, check the rubber O-ring or gasket for any signs of damage or wear. If it appears worn out or cracked, replace it with a new one.
Step 5: Apply a thin layer of propane-safe thread sealant to the valve’s threads before reattaching it to the propane tank. This will help create a tight seal and prevent leaks.
Step 6: Carefully thread the valve back onto the propane tank, turning it clockwise. Use the adjustable wrench to ensure it is securely tightened but avoid over-tightening.
Step 7: Once the valve is in place, turn on the propane tank slowly and check for any signs of leaks using a soapy water solution. Apply the solution to the valve connection and look for bubbles. If bubbles appear, tighten the valve further or consider replacing it.
Step 8: If no leaks are detected, ignite the propane appliance and monitor the valve connection for any additional signs of leakage. If you still notice a leak, it may be necessary to seek professional assistance or replace the valve.
Remember, if you are unsure or uncomfortable performing the repair yourself, it is always best to contact a professional propane service technician for assistance.
DIY Off Grid Propane Tank Refill
What should be done if the propane tank is leaking at the valve?
If the propane tank is leaking at the valve, it is important to take immediate action to ensure safety. Here’s what you need to do:
1. Turn off all flames and sources of ignition in the vicinity of the leaking propane tank.
2. Do not attempt to fix the valve yourself if you are not experienced with propane systems. It’s crucial to leave this task to professionals who have the necessary knowledge and expertise.
3. Contact your propane supplier or a qualified technician to report the leak and seek assistance. They will be able to guide you on the next steps and provide professional help.
4. In the meantime, you can minimize the risk by moving away from the leaking propane tank and ensuring that others are also at a safe distance.
5. Avoid using any electrical appliances or switches in the vicinity of the leak, as even a small spark can ignite the propane gas.
6. If the leak is severe or you smell a strong odor of propane, evacuate the area immediately and call emergency services.
Remember, dealing with propane leaks requires careful handling and expertise, so it’s always best to involve professionals to ensure safety for everyone involved.
How can a propane tank valve be unstuck?
To unstick a propane tank valve, follow these steps:
1. Safety first: Ensure that you are in a well-ventilated area and away from any open flames or sparks. Put on safety gloves and goggles before proceeding.
2. Inspect the valve: Check the valve for any visible signs of damage or debris. Remove any dirt, rust, or other obstructions that may be preventing it from turning.
3. Apply lubrication: Use a penetrating oil or lubricant specifically designed for valves. Apply a generous amount around the valve’s stem and let it sit for a few minutes to allow the lubricant to penetrate.
4. Gentle force: Use a wrench or pliers with a firm grip to try turning the valve counterclockwise. Apply steady and even pressure, but avoid excessive force that could damage the valve. If the valve doesn’t budge, proceed to the next step.
5. Heat the valve: Use a heat gun or hairdryer on high heat to warm up the valve. Focus the heat on and around the valve’s body, not directly on the propane tank itself. Heating the valve can help loosen any stuck components due to expansion.
6. Tap the valve: Use a rubber mallet or a wooden block and a hammer to gently tap the sides of the valve. The vibrations can help dislodge any stubborn debris or corrosion.
7. Repeat the process: If the valve still does not turn, repeat steps 3 to 6. Persistence and patience are key when dealing with stuck valves.
8. Seek professional help if necessary: If all attempts fail, or if the valve is seriously damaged, it’s advisable to consult a professional for repair or replacement.
Remember, handling propane tanks and valves incorrectly can be dangerous. If you are unsure or uncomfortable, always seek professional assistance.
Can a rubber seal be replaced in a propane tank valve?
Yes, a rubber seal can be replaced in a propane tank valve. To do so, follow these steps:
1. Ensure safety: Before starting any work on a propane tank, make sure to turn off the valve and disconnect the tank from any fuel sources.
2. Remove the valve: Use an adjustable wrench to carefully loosen and remove the valve from the tank.
3. Locate the rubber seal: Once the valve is removed, look for the rubber seal inside the valve assembly. It may be attached to the valve stem or seated within the valve body.
4. Inspect the seal: Check the rubber seal for any signs of wear, cracks, or damage. If it is worn out or damaged, it should be replaced.
5. Purchase a replacement: Visit a propane supply store or contact the manufacturer to obtain the correct replacement rubber seal for your specific propane tank valve.
6. Install the new seal: Carefully place the new rubber seal into the valve assembly, ensuring it is properly seated. This may require some gentle pushing or twisting to fit it securely.
7. Reassemble the valve: Once the new rubber seal is in place, reattach the valve to the propane tank. Use the adjustable wrench to tighten it securely, but avoid overtightening.
8. Test for leaks: After reassembling the valve, perform a leak test by applying a soapy water solution to the valve connections. If you see any bubbling or foam, there may be a leak. In such cases, tighten the connections further or seek professional assistance.
Remember, working with propane can be dangerous, so if you are unsure or uncomfortable performing these steps yourself, it is recommended to seek the help of a professional.
How can a small propane leak be repaired?
If you suspect a small propane leak, it’s important to act quickly and safely. Here are the steps to repair a small propane leak:
1. Safety first: Turn off all sources of ignition, such as flames or electrical devices, and evacuate the area where the leak is suspected. Open windows and doors to allow for ventilation.
2. Locate the leak: Use soapy water or a propane leak detector solution to identify the exact location of the leak. Apply the solution to fittings, connections, and valves, and watch for bubble formation. The bubbling indicates the presence of a leak.
3. Tighten fittings: If the leak is coming from a fitting, use an adjustable wrench to tighten it. Be careful not to overtighten, as it could cause damage. If the leak persists, proceed to the next steps.
4. Replace faulty components: If the leak comes from a valve, regulator, hose, or any other component, they may need to be replaced. Turn off the propane supply at the tank and consult the manufacturer’s instructions for proper replacement procedures.
5. Check for additional leaks: After repairing or replacing the faulty component, reapply the soapy water or leak detector solution to ensure there are no additional leaks. If more leaks are found, repeat the process until all leaks are fixed.
6. Test for proper operation: Once all the leaks have been repaired, slowly turn on the propane supply and check if everything is functioning properly. Look for any signs of leakage or abnormal operation.
7. Regular maintenance: To prevent future leaks, it’s crucial to perform regular maintenance on your propane system. This includes inspecting and tightening fittings, checking for wear and tear, and replacing components as needed.
Remember: If you’re unsure about handling a propane leak or are unable to fix it yourself, it’s best to contact a professional propane service technician. They are trained to handle such situations safely and efficiently.
Questions you’ve probably asked yourself
How to fix a leaking propane tank valve?
To fix a leaking propane tank valve, follow these steps:
1. Turn off the propane supply to ensure safety.
2. Inspect the valve for any visible damage or debris.
3. Tighten the valve connection by using an adjustable wrench.
4. Apply soapy water onto the valve connection and check for bubbles. If bubbles appear, there is still a leak.
5. If tightening the valve does not stop the leak, replace the valve with a new one.
6. Once the valve is fixed or replaced, test for leaks again by applying soapy water onto the connection.
7. Turn on the propane supply and check for any gas odor or bubbles.
8. If there are no leaks, you can safely use your propane tank again.
Remember, it is important to take proper safety precautions when working with propane. If you are unsure or uncomfortable with fixing the valve, it is best to contact a professional for assistance.
What are the steps to repair a propane tank valve leak?
The steps to repair a propane tank valve leak are as follows:
1. Safety first: Before attempting any repairs, ensure that the propane tank is turned off and disconnected from any gas sources.
2. Locate the leak: Use a soap and water solution applied to the valve area to identify any bubbles forming, indicating the presence of a leak.
3. Tighten the valve: If the leak is minor, you may be able to fix it by tightening the valve using an adjustable wrench. Ensure not to overtighten, as it may cause damage.
4. Replace the valve seal: If tightening the valve doesn’t solve the issue, you may need to replace the valve seal. Unscrew the valve using a wrench, remove the old seal, and replace it with a new one.
5. Check for leaks: After reassembling the valve, perform a leak test by applying the soap and water solution again. If no bubbles appear, the repair was successful.
6. Test pressure: Finally, reconnect the propane tank to a gas source, turn it on, and check the pressure using a pressure gauge. Any abnormal readings may indicate further issues.
Note: It’s important to consult a certified professional if you have any doubts or concerns about repairing a propane tank valve leak.
Are there any DIY methods to fix a leaking propane tank valve?
Yes, there are several DIY methods to fix a leaking propane tank valve. One common approach is to first turn off the gas supply and then tighten the valve with a wrench. If this doesn’t solve the issue, you can try applying a propane leak detection solution to identify the source of the leak. Once located, you may be able to tighten or replace the valve as necessary. However, it is recommended that you consult a professional if you are unsure or uncomfortable with handling the repair yourself.
In conclusion, fixing a leaking propane tank valve is essential for ensuring safety and preventing potential hazards. By following the step-by-step guide provided in this article, you can confidently address the issue and restore the functionality of your propane tank. Remember to prioritize safety measures, such as wearing protective gloves and working in a well-ventilated area. Regular maintenance and inspection are crucial to avoid future leaks. With proper knowledge and precautions, you can easily handle any propane tank valve issues that may arise. Stay informed, stay safe!